
454 Design: tools
Every tool in the panel on the left of 454 Design, group by group: what each one does and how to use it. Hover over any tool in Design for a short reminder of the same. For a walkthrough from a blank drawing to G-code, see the Design quick start.
Groups: File · Create vectors · Edit vectors · Align and nest · Guides
Before you start: typing exact values
Section titled “Before you start: typing exact values”Most tools can be used with the mouse alone, but for exact work you can type values at any time: just start typing while a tool is active, and a box appears at the pointer. Press Enter to use the value. Values are in the drawing’s units unless you type a unit after the number (3mm, 0.5in).
| Type | Means | Example |
|---|---|---|
x,y |
a point, measured from the drawing’s zero | 50,30 |
@dx,dy |
a point relative to the last one | @10,0 is 10 to the right |
length<angle |
a distance at an angle from the last point (degrees, counter-clockwise from the right) | 50<45 |
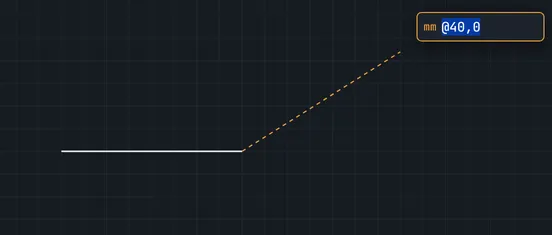
Snapping: while drawing, the pointer snaps to the ends, midpoints, corners and centers of shapes, to guides and where guides cross, and to the grid. A small square marks an end, corner or center; at the middle of a side (a line, a rectangle’s side, a segment of a polyline or outline, the middle of a curve or an arc) a triangle shows with the word Midpoint. Lines and polylines, vectors and construction lines alike, also snap to 0°, 45°, 90° and so on from their start: a dashed line and the angle show when they do, and holding Shift locks to the nearest one. (A shape’s point still wins over the angle.) Esc cancels whatever you’re in the middle of, and Ctrl+Z undoes almost anything.
Starting, opening, importing and saving drawings, and handing them to other software; and undo, redo, fitting the view and measuring, which used to be a group of their own (View & History).
Clears all shapes and guides, to start a fresh drawing.
- Click New.
- Changed your mind? Ctrl+Z brings everything back. If the drawing hadn’t been saved to a file, Recover last drawing can bring it back later too.
Saves the drawing, with its toolpaths, to a .454.json file you can open again later.
- Click Save (Ctrl+S). The first time, choose where to put the file. After that, Save saves straight back to the same file, without asking.
- Save as (Ctrl+Shift+S) always asks: to save a copy under another name, or somewhere else. Save then goes to the new file.
- Keep it with the job’s G-code, or as a backup.
In the desktop app, a drawing you open (with Open, Ctrl+O, or by dropping it on the window) saves back to its own file, and 454 Design remembers which file it is: Ctrl+S still saves there after you close 454 Design and open it again. If the file has been moved or deleted, Save asks where instead. In a browser, Save goes back to the file for as long as the page stays open (Chrome and Edge; other browsers download the file each time).
Design also keeps the drawing in the browser (or the desktop app) as you work, so it’s there when you come back. That isn’t a file, though: when you close Design with a drawing that hasn’t been saved to a file since it last changed, it asks first. The desktop app asks Save…, Don’t save or Cancel; a browser shows its own “Leave site?” warning. Exporting a DXF or SVG doesn’t count as saving the drawing.
Shortcut: Ctrl+O
Opens a saved drawing, or a project from VCarve or Carbide Create, in place of the drawing that’s open. (The one that was open isn’t lost: if it wasn’t saved, Recover last drawing brings it back.)
- Click Open and pick a file, or drag it onto Design’s window.
- A saved drawing (
.454.json) opens as it was. - A VCarve project (
.crv) opens a panel: choose whether to bring in the Drawing vectors and the Toolpath preview vectors, and millimetres or inches. The material size comes across too, and the project’s toolpaths can be made editable in Design afterwards. - A Carbide Create project (
.c2d) opens with its shapes, text, layers, material and zero; see Open a Carbide Create project.
Recent files (the desktop app). File → Open recent lists the last ten projects you opened or saved, newest first, each with its folder. Click one to open it again. A file that’s been moved, renamed or deleted says so and comes off the list; Clear this list empties it. Files brought in with Import aren’t listed.
Import
Section titled “Import”Shortcut: Ctrl+I
Brings DXF or SVG vectors into the drawing that’s open, or a picture to trace.
-
Click Import and pick a file, or drag it onto Design’s window. DXF and SVG files can be picked or dropped several at once.
-
DXF and SVG files open a panel:
- Into: Add to this drawing (the default when something’s drawn) keeps everything that’s there, toolpaths included; Replace the drawing starts again with just the file’s shapes.
- Place: Beside what’s drawn, At X0 Y0, or Where the file has them. Several files go side by side.
- Scale to width (one file at a time), and for a DXF, whether its numbers are millimetres or inches.
The new shapes come in selected, ready to drag into place. The file’s layers join layers of the same name, and new names become new layers. A DXF keeps its true curves. An SVG comes in at its real size, from its own units; its curves, circles, rectangles and Inkscape layers come across, but text doesn’t: convert text to paths in your editor first. An SVG saved by Design comes back exactly where it was.
-
An image (PNG, JPG, GIF, BMP or WebP) opens the Trace image panel: set the Threshold (or press Auto), Invert for light artwork on a dark background, the Smoothing, specks to ignore, and the traced width, then press Trace. Fit curves turns the outlines into smooth arcs and lines with far fewer points.
Recover last drawing
Section titled “Recover last drawing”Brings back the last drawing that was put aside without being saved to a file: one closed with Don’t save, cleared with New, or replaced by opening another drawing. One is kept at a time, the most recent.
- Click Recover last drawing. Pointing at it shows when that drawing was put aside. It’s greyed out when there’s nothing to recover.
- If the drawing that’s open hasn’t been saved either, the two swap places, so neither is lost: Recover again swaps them back.
Export DXF
Section titled “Export DXF”Saves the drawing as a DXF file, for VCarve, Fusion, a laser, or other CAD and CAM software.
- Click Export DXF and choose where to save it.
- Shapes keep their true curves and their layers; everything is in millimetres.
Export SVG
Section titled “Export SVG”Saves the drawing as an SVG file, for laser software, vinyl cutters and Inkscape.
- Click Export SVG and choose where to save it.
- It’s true to size in millimetres, with true curves and your layers.
Shortcut: Home
Zooms and moves the view so everything you’ve drawn fits the window. With nothing drawn yet, it fits the material. Shapes on hidden layers, and on other sheets, are left out. Changing the material’s size fits the material.
- Click Fit, or press Home.
Shortcut: Ctrl+Z
Takes back the last change.
- Click Undo, or press Ctrl+Z. Keep going to step further back.
To go back several steps at once, click the step on the History bar, along the bottom of the drawing.
Shortcut: Ctrl+Y
Puts back what Undo took away.
- Click Redo, or press Ctrl+Y.
Measure
Section titled “Measure”Shortcut: I
Measures without changing anything: the distance and angle between two points, or the gap between two shapes.
- Between two points: click one point, then the other.
- The gap between two shapes: Shift-click one shape, then Shift-click the other.
Create vectors
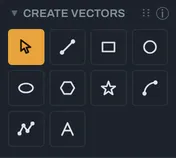
Section titled “Create vectors”Selecting, and drawing new shapes.
Select / move
Section titled “Select / move”Shortcut: V
Picks shapes so you can move them, change them, or use another tool on them.
- Click a shape to select it; Shift-click to add or remove shapes.
- Drag a box on empty space: left to right selects shapes entirely inside it; right to left also selects any shape it touches.
- Drag a selected shape to move it, or nudge it with the arrow keys: 1 mm a press, 0.1 mm with Shift.
- Handles show round what’s selected, as in VCarve: corners scale in proportion, sides stretch one way. Click a selected shape again for rotate handles (curved arrows at the corners, and a centre to turn about, which you can drag); click it again for the scale handles. Shift while turning goes in 15° steps.
- Delete removes what’s selected.
- Ctrl+C copies what’s selected, Ctrl+X cuts it, and Ctrl+V pastes it: see Copy and paste.
Exact position, size and rotation
Section titled “Exact position, size and rotation”While shapes are selected, the Selection box at the top of the drawing shows where they are and how big, and takes exact values, like VCarve’s Move, Set Size and Rotate:
- The small grid on its left picks the reference point: a corner, the middle of a side, or the centre. X and Y are where that point is, and it stays put when you resize or rotate.
- X and Y: type where the reference point should be, and press Enter. The selection moves there.
- W and H: type the width or height. With the padlock closed, the other changes in proportion; click the padlock to set them separately. Stretching a circle one way makes an ellipse.
- Rotate: type the angle in degrees and press Enter to turn the selection about the reference point: positive anticlockwise, negative clockwise. A rectangle turned 90° stays a rectangle.
Values are in the units the drawing is shown in (millimetres or inches). Esc puts back what you typed; Ctrl+Z undoes a change.
Copy and paste
Section titled “Copy and paste”Copies shapes, with their dimensions, to paste somewhere else in the drawing, or into another drawing.
- Select the shapes, then press Ctrl+C to copy them, or Ctrl+X to cut them (copy, then remove).
- Press Ctrl+V to paste: the copy lands centred on the pointer, and snaps as drawing does. If the pointer isn’t over the drawing, it goes 10 mm right and down from the original.
- Or press Ctrl+Shift+V to paste it exactly where it was copied from, then move it precisely: type its X and Y in the box above the drawing, or use the arrow keys.
The pasted shapes come in selected. Paste again for another copy. In the desktop app, Edit → Copy, Cut and Paste do the same.
- Dimensions come along. Every dimension that measures only copied shapes is pasted measuring the copies: a rectangle’s width, or the distance between two parts you copied together. Change a copy through its dimension and the original stays as it was. A dimension to a shape you didn’t copy stays with the original.
- Toolpaths don’t. They belong to the original shapes: add the copies to a toolpath, or make a new one.
- Layers: a copy goes on its own layer, or on the current layer if its own is hidden or locked.
- What’s copied stays available after you close 454 Design, and in another 454 Design window. In a text box, the keys copy and paste text as usual.
Shortcut: L
Draws straight lines, one after another.
- Click the first point, or type it as
x,y. - Click the next point, or type it:
x,y,@dx,dyorlength<angle. Each click adds a line from the last point. Near 0°, 45°, 90° and so on, the line snaps to that angle; hold Shift to lock it to the nearest one. - Press Esc when you’re done.
Rectangle
Section titled “Rectangle”Shortcut: R
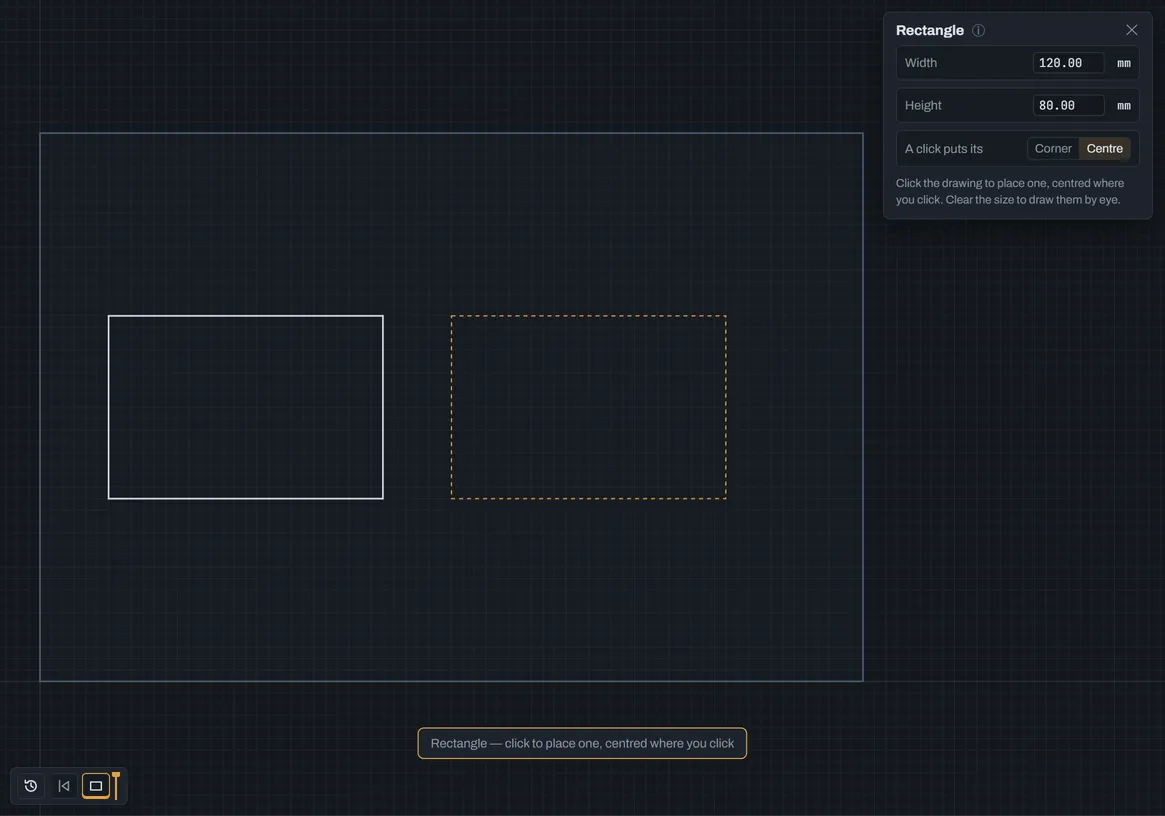
Draws a rectangle. Its panel opens beside the drawing while the tool is in use.
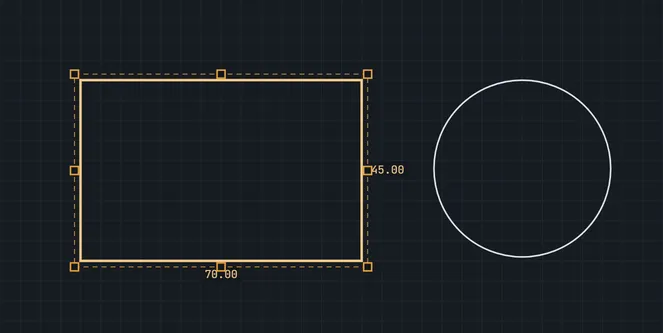
- To draw it by eye, leave Width and Height empty: click one corner (or type it as
x,y), then the opposite corner (or type the size aswidth,height, such as120,80). - For an exact size, type the Width and Height, and choose whether a click puts its bottom-left Corner or its Centre where you click. A dashed rectangle follows the pointer: each click places one.
Circle
Section titled “Circle”Shortcut: C
Draws a circle. Its panel opens beside the drawing while the tool is in use.
- To draw it by eye, leave Diameter empty: click the centre (or type it as
x,y), then a point on the edge, or type the size:D5for a 5 mm diameter,R2.5for a 2.5 mm radius. - For an exact size, type the Diameter. A dashed circle follows the pointer: each click places one, centred where you click. Handy for a row of holes: click each centre.
Ellipse
Section titled “Ellipse”Draws an ellipse, square to the material. Rotate it afterwards if it should lean. Its panel opens beside the drawing while the tool is in use.
- To draw it by eye, leave Width and Height empty: click the centre (or type it as
x,y), then a corner of the box it fits in, or type its width and height, such as120,60. - For an exact size, type the Width and Height. Each click places one, centred where you click.
An ellipse is made of arcs that stay within 0.0005 mm of a true ellipse, far finer than any bit cuts, so it offsets, cuts and exports like any other outline. Its points can be moved with Edit nodes, but it doesn’t stay an ellipse you can resize by typing, as a rectangle does.
Polygon
Section titled “Polygon”Draws a regular polygon: a triangle, square, hexagon, octagon, and so on. Its panel opens beside the drawing while the tool is in use.
- Set Sides: type it, or click − and +. It’s remembered for next time.
- To draw it by eye, leave Size empty: click the centre, then where one corner goes.
- For an exact size, choose whether it’s measured across the Flats (the size a spanner fits) or the Corners, and type the Size. A dashed polygon follows the pointer: each click places one there, centred where you click, standing on a flat.
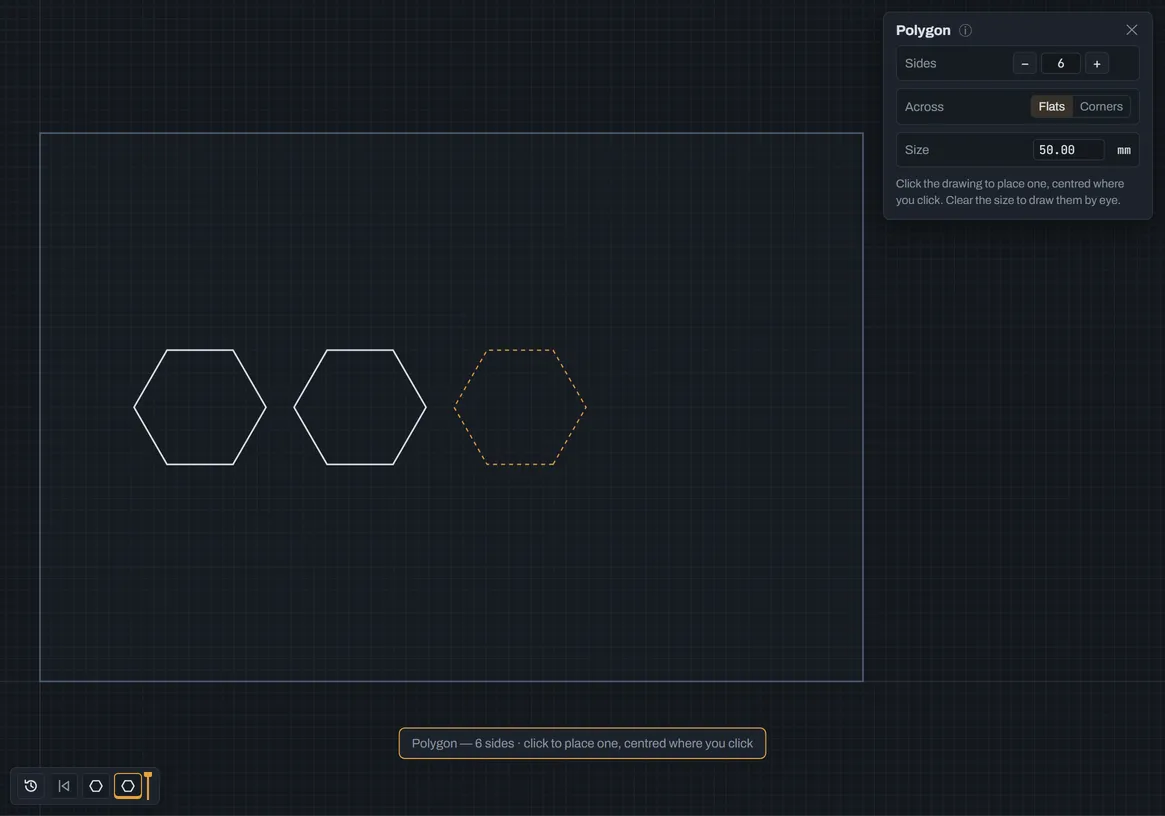
The typed codes still work: S8 for 8 sides, a centre as x,y, then R40 to the corners, D80 across them or
F70 across the flats.
Draws a star. Its panel opens beside the drawing while the tool is in use.
- Set Points: type it, or click − and +.
- Set Inner corners: how far out they sit, as a share of the way to the tips. Less makes a spikier star.
- To draw it by eye, leave Across the tips empty: click the centre, then the tip of one point.
- For an exact size, type Across the tips. Each click places one, centred where you click, with a point straight up.
The typed codes still work: S6 for 6 points, a centre as x,y, then R40 to the tips or D80 across them.
Shortcut: A
Draws an arc through a start and end point.
- Click the start point, or type it.
- Click the end point, or type it (
x,y,@dx,dyorlength<angle). - Move the pointer to bow the arc and click to place it, or type a radius: a positive radius bows it to the left of the line from start to end, a negative one to the right.
Polyline
Section titled “Polyline”Shortcut: P
Draws a connected outline of straight lines, open or closed.
- Click the first point, or type it.
- Click each next point, or type it (
@dx,dyandlength<anglework too). - Click the first point again to close the shape, or press Enter to leave it open.
Shortcut: K
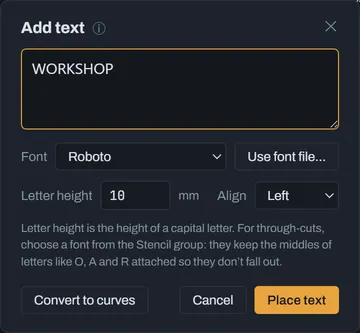
Adds text, in any of Design’s fonts or one from your computer.
- Click where the text should start: the bottom of the first letter.
- In the Add text panel, type the text, and choose the Font (or Use font file… for a
.ttf,.otfor.woff), the Letter height and the Alignment. - Press Place text to add it as text you can edit later, or Convert to curves to add it as ordinary shapes.
- To edit text later, click it with the Text tool, or double-click it with Select.
Edit vectors
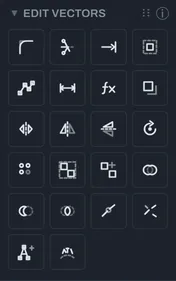
Section titled “Edit vectors”Changing shapes you’ve drawn: corners, trimming, offsets, copies, arrangement and more. Tools that act on a selection need something selected first: press V, pick the shapes, then choose the tool.
Fillet
Section titled “Fillet”Shortcut: F
Rounds a corner, or cuts a relief into it so a square part fits a CNC-cut pocket. It can also put a rounded corner back to sharp.
- Set the size in the Radius box at the bottom of the drawing, or just start typing a number.
- Choose the corner type beside it: Round, Dog-bone (a relief at the corner, for the bit’s radius), or T-bone (a relief into one edge; click nearer the edge it should cut into).
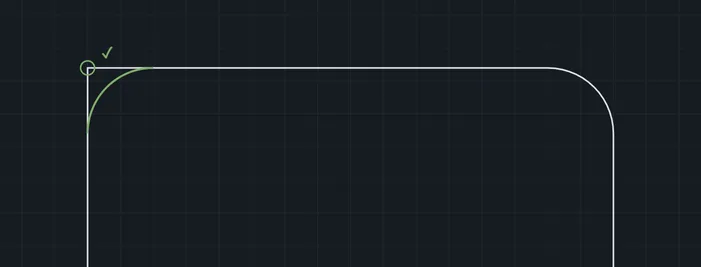
- Move over a corner: a green check and a preview show what a click will do. Click to apply it. This works on outline and rectangle corners, and (with Round) where two separate lines meet.
- To make a rounded corner sharp again, click the rounded corner: the sharp corner that will come back is shown dashed in amber first.

Fillet corners
Section titled “Fillet corners”Rounds every corner of some shapes at once, instead of clicking them one by one. Select the shapes first, then click Fillet corners beside Fillet in the toolbar, or All corners… at the bottom of the drawing while Fillet is active. A panel opens:
- Shapes: how many are chosen. Click a shape on the drawing to add it or take it out.
- Radius: the size, the same as the Fillet tool’s. For a dog-bone or T-bone it’s the bit’s radius.
- Corner: Round, Dog-bone or T-bone, as for Fillet.
- Which: All corners, only those Pointing out of the shape, or only those Pointing in. An L-shape has five corners pointing out and one pointing in.
The drawing shows what OK will do: each new corner in green, and a red ring on any corner that can’t be done. That’s a corner whose radius is too big for the edges beside it (two fillets on a short edge would run into each other), or a dog-bone or T-bone beside a curved edge. Those corners stay sharp. The rings stay on the drawing after OK, so you can find them and round them with the Fillet tool and a smaller radius. They go at your next change, or when you press Esc.
Dog-bones and T-bones go only where the bit can’t reach into a corner, so All isn’t offered for them:
- Pointing out, for a pocket or an inside cut: the corners of the hole.
- Pointing in, for a part cut out round its outside: its inside corners.
A curve drawn as many short straight pieces, as in a traced picture or an imported outline, isn’t treated as corners: only turns of more than 10° are. Open shapes are rounded with All, and left out with Pointing out or in, since they have no inside. One Undo puts everything back.
Shortcut: T
Removes a piece of a line, arc or circle, cut off where other shapes cross it.
- Click the piece you want to remove. The crossings on either side mark where it’s cut.
Extend
Section titled “Extend”Shortcut: E
Lengthens a line, an arc, or the open end of a polyline or outline (shapes you’ve joined, say) until it meets the next shape, or another part of itself. A straight end carries on in a straight line; a curved end carries on round the same circle.
- Click near the end you want to lengthen. It runs out to the next shape in that direction.
Offset
Section titled “Offset”Shortcut: O
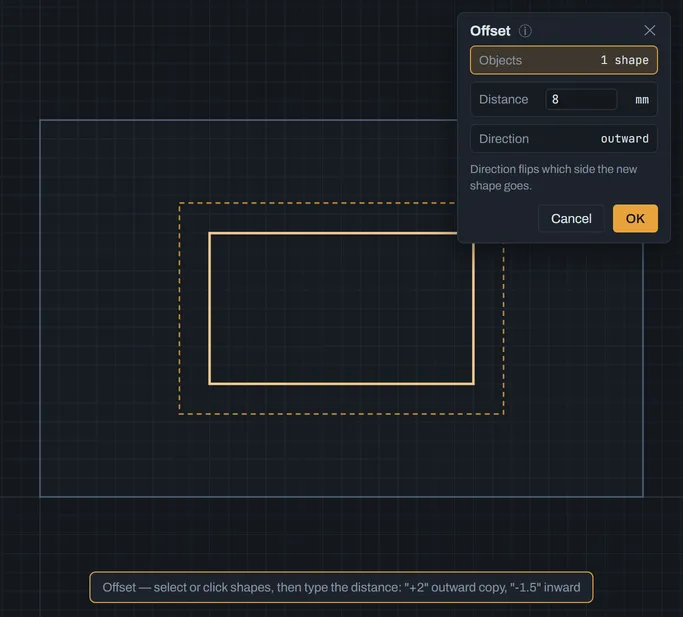
Makes a copy of shapes a set distance outside or inside them, like a border.
- Select the shapes, or click them after choosing Offset.
- In the Offset panel, type the Distance, and click Direction to switch between outward and inward. A preview shows the result.
- Press OK. You can also type the distance directly:
+2for 2 mm outward,-1.5for inward.
Edit nodes
Section titled “Edit nodes”Shortcut: N
Moves the individual points of an outline, or sets them exactly.
- Click an outline to show its points.
- Drag a point to move it.
- Click a point to type its exact position as
x,y. - Click a segment to type its length; the later point moves along the segment.
- Press Esc when you’re done.
Dimension
Section titled “Dimension”Shortcut: D
Sets exact distances and sizes, and keeps a dimension on the drawing that updates as things change.
- For a distance between two shapes: click the edge of the shape to move, then the edge to measure from (that shape stays put). Type the distance and press Enter. Start it with
Eto measure edge to edge. - For a shape’s own size: click a rectangle’s side twice for its width or height (or a line for its length, a circle for its diameter, an arc for its radius), type the size, and press Enter.
- To change a dimension later, click its value. To remove one, click it and press the ✕ beside the value.
- To move a dimension out of the way, use the Select tool and drag its value. A distance’s line moves out to the side, square to what it measures, with thin lines back to the edges; its value slides along it. A diameter or radius can go anywhere, with a thin line back to its circle. It stays where you put it when the shapes move. Esc during the drag puts it back. Moving one isn’t a change to the drawing, so it isn’t a step on the History bar.
- To see the drawing without them, press Shift+D: every dimension is hidden, and a note in the top left corner says how many. Press it again, or pick the Dimension tool, to show them. (Also View → Show or hide dimensions in the desktop app, and Show dimensions layer in Settings.) Hidden dimensions still hold their shapes.
A distance on each side stretches the shape. When a shape is already held by a distance on its opposite side, a new distance moves just the edge you clicked, instead of the whole shape. So to place a rectangle 10 mm inside another on both sides: set one side’s distance, which moves it into place, then the other’s, which stretches it to fit. Changing either one later keeps the other. The same works for straight-edged outlines.
Dimensions follow their edges. A dimension remembers which edges it measures, so it keeps measuring them when shapes are moved or stretched. A rectangle’s size keeps any side held by a distance where it is; if both sides are held, it says so rather than breaking one of them.
Dimensions survive the tools that remake shapes. Fillet corners, Trim, Join and Explode make new shapes out of old ones, and the dimensions move onto them: a rectangle’s width or height stays its width or height once its corners are rounded (measured between its sides, out to where the corners were; type a new size and the outline stretches, its rounded corners kept), and a line’s length becomes the length of that edge of the outline it joined. A distance to an edge of an outline stays on that edge when the outline gains or loses points (its corners rounded, a point added or taken away). A dimension whose shape is really gone, or whose two edges aren’t parallel any more, is removed, with a note, and Undo brings it back. A toolpath that cut a shape that’s gone says so: edit it and pick the new shape, or that part won’t be cut.
Parameters
Section titled “Parameters”The fx button, beside Dimension. Parameters are named sizes, saved with the drawing: thickness,
dado, shelf_gap. Use one in a dimension, and when you change the parameter, every dimension using it
follows, so a change of plywood is one edit instead of a dozen.
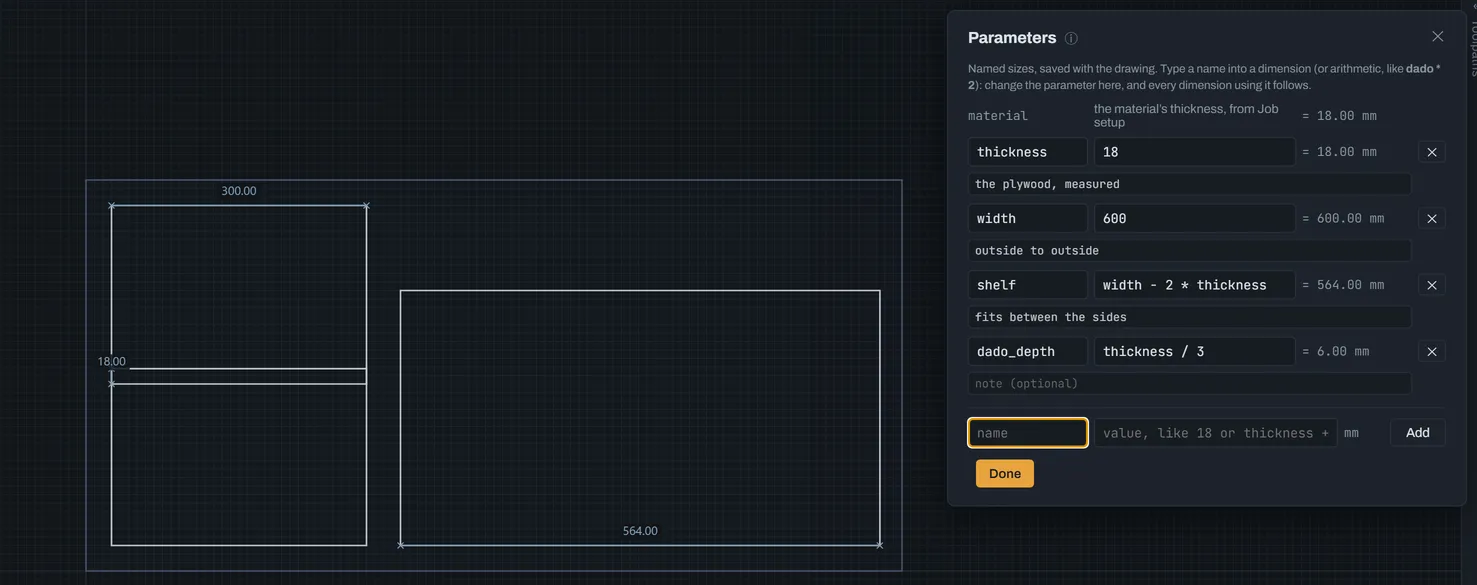
- Press fx, type a name and a value, and press Add. A value can be a number (
18.3,3/4), or arithmetic using other parameters:thickness + 0.2,(height - 3 * thickness) / 2. - In a dimension, type the parameter’s name, or arithmetic with it (
dado * 2), instead of a number. While you type, your parameters are listed under the box with what each comes to, narrowed to the name you’ve started: click one, or press Tab for the top one (or ↓ ↑ and Enter). The dimension shows its value; point at it to see the parameter, like 18.50 = dado. - Change a value in the list, and every dimension using it, and the shapes they drive, follow. One Ctrl+Z takes the whole change back.
material is always there: the material’s thickness from Job setup. A dado that’s material + 0.2
follows when you change the sheet you’re cutting.
- Units: numbers mean the units the drawing showed when you typed them, and a number can say its own:
18mm,3/4in,3/4". Each parameter keeps its units, so switching the drawing between mm and inches doesn’t change any sizes. - Typing a plain number into a linked dimension unlinks it. Measurements typed as before still work:
12 1/2is twelve and a half, andEstill means edge to edge. - Renaming a parameter changes it everywhere it’s used. One that’s in use can’t be deleted until the dimensions and parameters using it are changed.
- Mistakes are refused, with what’s wrong: a name that doesn’t exist, a bracket left open, or a parameter that would depend on itself. Nothing changes until it’s put right.
- In toolpaths and other boxes: a toolpath’s depth and tabs can use parameters too, and follow them
(see the CAM reference). Every other length box, such as the selection box’s
W and H, or an offset, takes a parameter or arithmetic (
600 - 2 * thickness) and works it out once. - Only what’s dimensioned follows. A dimension sets the size or distance it measures, nothing more: if a shelf should stay against a side when the sides move, give it a distance to that side too. A dimension that’s been moved by hand, or can’t be what its parameters say, is marked ⚠.
Shortcut: M
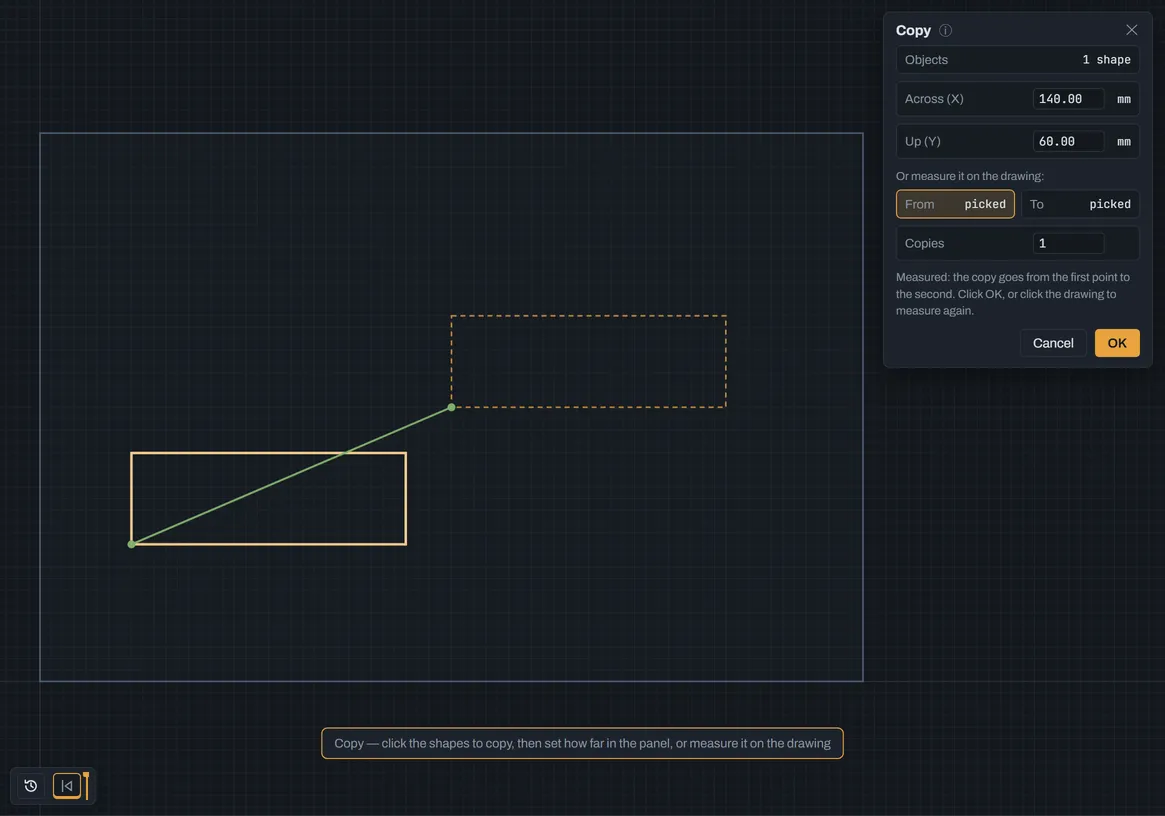
Makes copies of shapes a set distance away. The Copy panel opens beside the drawing, and the copies show dashed until you click OK.
- Click Copy. Shapes you selected first are already in Objects; click others on the drawing to add them, or click one again to take it off.
- Say how far: type Across (X) and Up (Y) (negative goes left or down), or measure it on the drawing: click a point on the shapes for From (it snaps to corners and centres), then where that point should go for To. Across and Up fill in.
- Copies is how many: with more than one, each goes the same distance on from the one before.
- Click OK, or press Enter in any box. The copies are left selected, so Copy again copies them on.
The History bar can change the distance afterwards. For copies in a grid or round a circle, use Array.
Mirror
Section titled “Mirror”Shortcut: Shift+M
Makes a mirrored copy of shapes, as if seen in a mirror along a line.
- In the Mirror panel, click Objects and pick the shapes, then click Mirror line and pick the line to mirror across. A construction line is used as the mirror line automatically (to make a line a construction line, select it and press X).
- Or click two points to set a mirror line of your own.
- Press OK to make the mirrored copy.
Keep the copies mirrored (ticked unless you untick it) keeps each copy the mirror of its original. Move an original, resize it, or change a dimension that places it, or move the mirror line, and the copy follows. Change a copy by itself and it lets go, and Design says so; from then on it’s an ordinary shape. Select a copy or its original to see the link, and click its chain marker to stop it, as with Keep lined up. Untick the box for plain copies.
Flip horizontal
Section titled “Flip horizontal”Shortcut: Shift+H
Turns the selection over left to right, where it is.
- Select the shapes, then click Flip horizontal.
Flip vertical
Section titled “Flip vertical”Shortcut: Shift+V
Turns the selection over top to bottom, where it is.
- Select the shapes, then click Flip vertical.
Rotate
Section titled “Rotate”Shortcut: Shift+R
Turns shapes by an exact angle. The Rotate panel opens beside the drawing, and the turned shapes show dashed until you click OK.
- Click Rotate. Shapes you selected first are already in Objects; click others on the drawing to add them, or click one again to take it off.
- Choose what they turn about: Their centre (the middle of the box round them), or A point: click it on the drawing (it snaps to corners and centres), or type its X and Y. A green cross shows it.
- Type the Angle, or click a quick one: 90° and 45° either way, or 180°. Positive turns anticlockwise, negative clockwise.
- Click OK, or press Enter in any box.
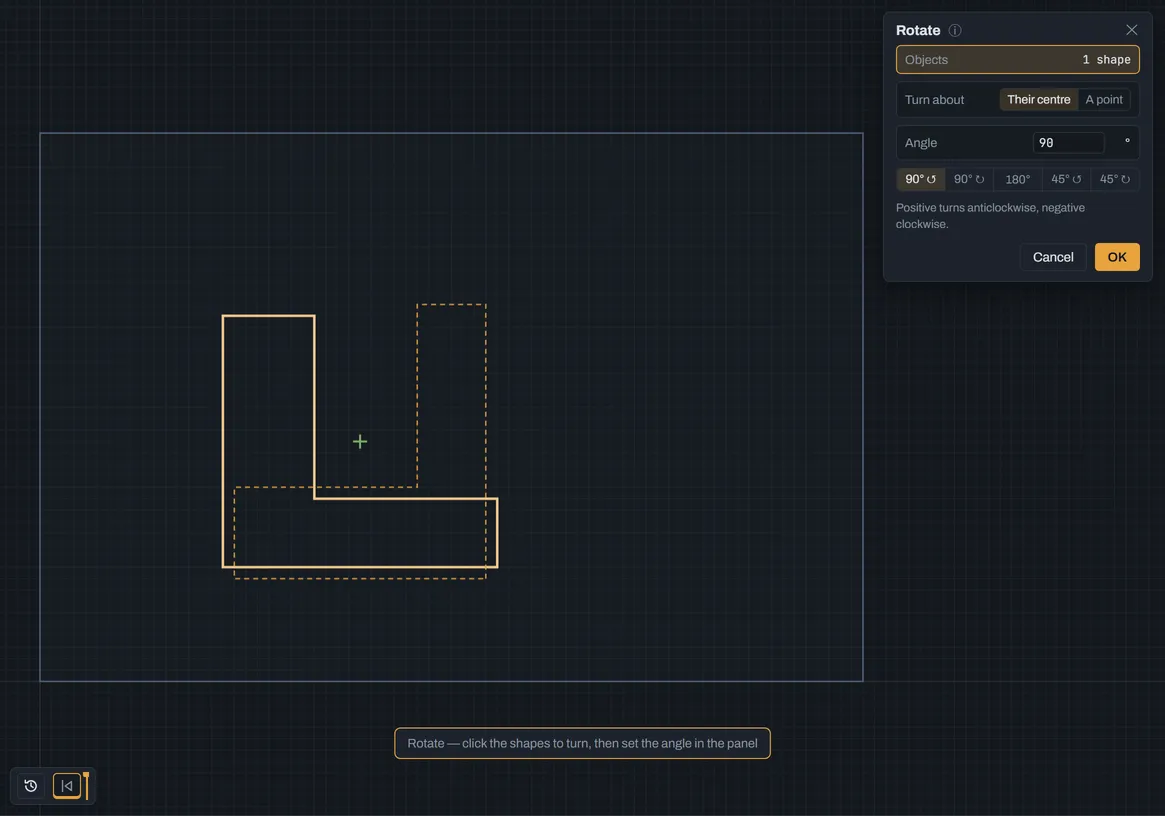
The History bar can change the angle afterwards.
Shortcut: Y
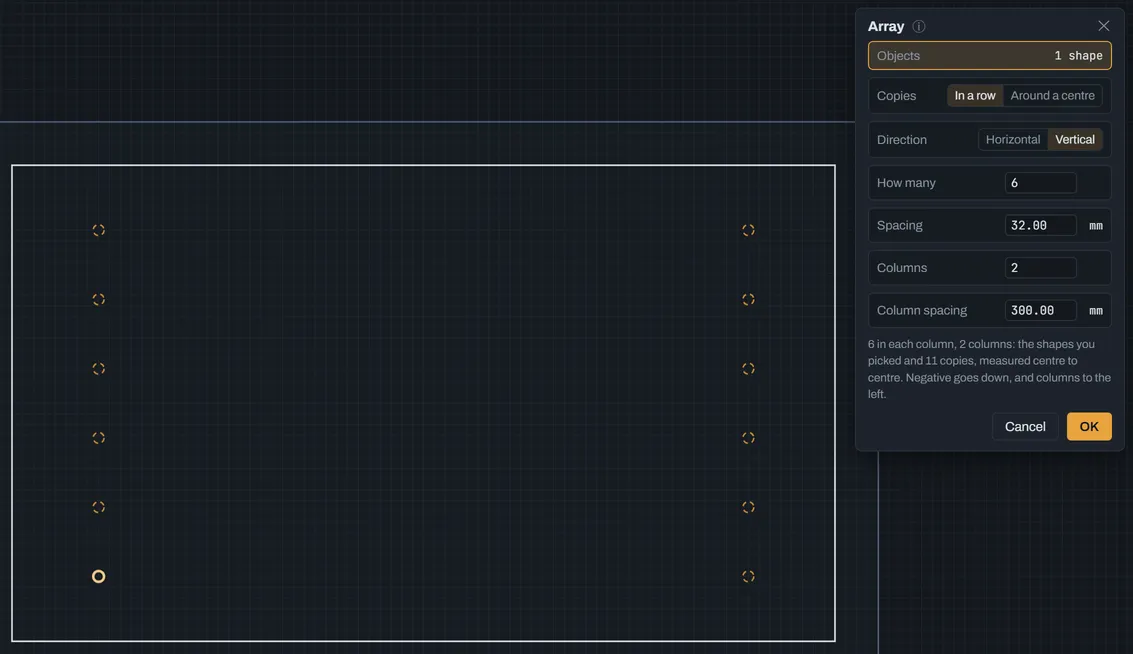
Makes several evenly spaced copies: in a row, in rows (a grid), or around a centre. The Array panel opens beside the drawing, and the copies show dashed until you click OK.
- Click Array. Shapes you selected first are already in Objects; click others on the drawing to add them, or click one again to take it off.
- Choose how the copies are laid out:
- In a row: choose Horizontal (side by side) or Vertical (one above another). How many counts the shapes you picked, so 5 makes 4 copies. Spacing is how far each is from the one before, centre to centre; a negative number goes left (or down).
- Rows is 1 to start with. Make it more for a grid: each row is the same, Row spacing apart, stacking upwards (negative goes down). For a vertical row they’re Columns, stacking to the right.
- Around a centre: click the centre on the drawing (it snaps to a circle’s centre), or type its X and Y. Set How many. With Spread evenly round a full circle ticked they’re shared out round 360°; untick it to set the Angle between them (positive is anticlockwise, negative clockwise).
- Click OK, or press Enter in any box. The shapes and their copies are left selected, to move as one.
Shortcut: Ctrl+G
Bundles the selected shapes so they select and move as one piece. Nothing about the shapes changes.
- Select the shapes, then click Group.
Ungroup
Section titled “Ungroup”Shortcut: Ctrl+U
Breaks a group back into its separate shapes.
- Select the group, then click Ungroup.
Joins closed shapes that overlap or touch into one outline, and removes the lines inside. Use it for a sign with a rounded end, a board with a handle, or letters that run into each other.
- Select two or more closed shapes (rectangles, circles, closed outlines, groups or text).
- Click Weld.
Shapes in the selection that don’t overlap or touch anything else are left as they were. Holes stay holes: a letter’s middle, or a gap the shapes surround, comes out as its own outline.
Subtract
Section titled “Subtract”Cuts the other selected shapes out of the biggest one, like cutting a notch or a finger hole out of a part.
- Select the part and the shapes to cut out of it.
- Click Subtract.
The biggest shape is the one kept. If two shapes are the same size, such as two circles for a crescent moon, the one you picked first is kept: click it, then Shift+click the other. A shape wholly inside the part becomes a hole in it. Selected shapes that don’t overlap the part are left alone.
Intersect
Section titled “Intersect”Keeps only the area that all the selected shapes share, and removes the rest.
- Select the shapes.
- Click Intersect.
If the shapes don’t all overlap, nothing changes and Design says so.
Joins open shapes whose ends meet into one continuous outline, such as lines drawn separately into a closed shape.
- Select the open shapes, then click Join.
Explode
Section titled “Explode”Breaks an outline into its separate lines and arcs.
- Select the outline, then click Explode.
Convert to curves
Section titled “Convert to curves”Turns text into ordinary shapes, so you can trim, offset or reshape the letters.
- Select the text, then click Convert to curves.
Text on curve
Section titled “Text on curve”Lays text along a line, an arc, a circle or any outline, each letter turned to follow it: an arched sign, or a name round a plate or a badge.
- Add the text with the Text tool, and draw the curve.
- Select the text and the curve (click one, then Shift+click the other).
- Click Text on curve.
The text sits on top of the curve, reading left to right, centred. On a circle it goes across the top. The curve stays in the drawing: keep it as a guide or cut, or delete it.
To change how it sits, double-click the text (or click it with the Text tool). The Text panel has, as well as the words, font and height:
- On the curve: from the start, centred, or to the end. On a circle, that’s measured from its top (its bottom, when reversed).
- Gap: space between the curve and the letters.
- Letters: standing on the curve, or hanging under it (tops towards it), such as text inside an arch.
- Reverse: runs the other way. On a circle, this puts the text along the bottom, still reading left to right, which is what a round badge needs.
- Straighten takes the text off the curve.
If the text is longer than the curve, the panel says so. Moving, turning or scaling the text takes its curve with it; changing the letter height keeps the same curve.
Align and nest
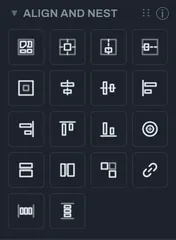
Section titled “Align and nest”Arranging shapes: packing parts onto the material, centering, lining up and spacing. The tools that line shapes up use the last one you picked as the reference, outlined in green.
Nest parts
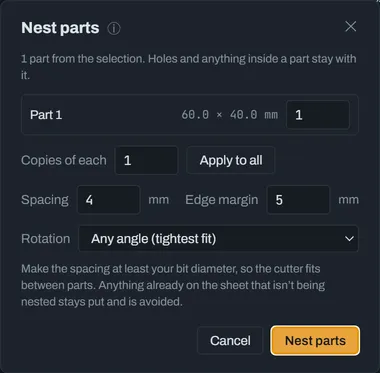
Section titled “Nest parts”Packs parts onto the material as tightly as it can, to save material, with as many copies as you ask for.
- Select the parts to nest, or select nothing to nest everything.
- In the Nest parts panel, set the Copies of each, the Spacing between parts, the Edge margin from the material’s edges, and the Rotation: any angle for the tightest fit, 90° steps, or none, to keep parts as drawn.
- Press Nest parts. The parts are laid out on the material.
Center in material
Section titled “Center in material”Shortcut: F9
Moves the selection, as one block, to the middle of the material.
- Select the shapes, then click Center in material.
Center left-right in material
Section titled “Center left-right in material”Moves the selection sideways to the middle of the material, leaving its height as it is.
- Select the shapes, then click the tool.
Center top-bottom in material
Section titled “Center top-bottom in material”Moves the selection up or down to the middle of the material, leaving it where it is sideways.
- Select the shapes, then click the tool.
Center on last picked
Section titled “Center on last picked”Centers the other selected shapes on the last one you picked.
- Select the shapes to move, then Shift-click the one to center them on last.
- Click Center on last picked.
Line up centers left-right
Section titled “Line up centers left-right”Moves shapes sideways so their centers line up with the last one picked.
- Select the shapes, picking the one to line up with last, then click the tool.
Line up centers top-bottom
Section titled “Line up centers top-bottom”Moves shapes up or down so their centers line up with the last one picked.
- Select the shapes, picking the one to line up with last, then click the tool.
Align left, right, top or bottom edges
Section titled “Align left, right, top or bottom edges”Four tools that line up the shapes’ left, right, top or bottom edges with the last one picked.
- Select the shapes, picking the one to line up with last, then click the edge to line up.
Concentric
Section titled “Concentric”Moves the other selected shapes so their centres sit on the last one picked. For a circle or an arc that’s its own centre, the point it’s drawn round, which for an arc isn’t the middle of its box. For any other shape it’s the middle.
- Select the shapes, picking the one to centre them on last, then click Concentric.
Same width, Same height, Same size
Section titled “Same width, Same height, Same size”Make the other selected shapes the same size as the last one picked. Each one is resized about its own centre.
- A rectangle takes the width, the height, or both, of any shape: another rectangle, a circle (its diameter) or an outline (the box round it).
- A circle or an arc takes the radius of another circle or arc. All three buttons do the same for these.
- A line takes the length of another line, measured from its start.
- Other shapes, such as outlines and text, aren’t resized, because they’d have to be stretched out of shape. Design says so.
- Select the shapes, picking the one whose size they take last, then click the button.
Keep lined up
Section titled “Keep lined up”The chain-link button. On its own, an Align button lines shapes up once: change one afterwards and they come apart. With Keep lined up on, they stay lined up. A hole centred on a board stays centred when you make the board wider, whether you type a new dimension, change a parameter, change a step on the History bar, or drag the board.
- Click Keep lined up, so it’s lit. It stays on until you click it again.
- Line shapes up as usual: select them, picking the one to follow last, then click an Align button. Center on last picked, Line up centers, the four Align edges buttons, the three Center in material buttons, Concentric and the three Same size buttons can all be kept. For example, make three holes the same size as the first, and they follow when you type a new diameter into it.
From then on, the shapes you lined up follow the last one picked, or the material:
- They move, but never turn or change size, unless they’re kept the same size. Each keeps only what you lined up. A slot with its left edge kept in line can still be moved up and down. Moved sideways on its own, it goes back in line, and Design says why.
- Shapes can follow shapes that follow others. A slot centred on a hole that’s centred on a board follows both. A shape can’t follow itself through others: Design says so and leaves it as it was.
- Lining a shape up again replaces its old link in that direction: the newest one wins.
- Fillet corners keeps the link. So does any tool that remakes a shape in the same place (Weld with a shape inside it). If the shape is deleted, or a tool remakes it a different size (Trim), the link goes, and Design says so.
- Only one shape at a time can be kept centred in the material. To keep several centred together, group them first (Ctrl+G).
- Space evenly lines shapes up once. It isn’t kept.
To see a link, select either shape. A dashed line shows what it follows, with the shape it follows outlined.
To stop keeping it, click the chain-link marker by the shape’s top right corner, then Stop keeping lined up. The shapes stay where they are. Undo brings the link back.
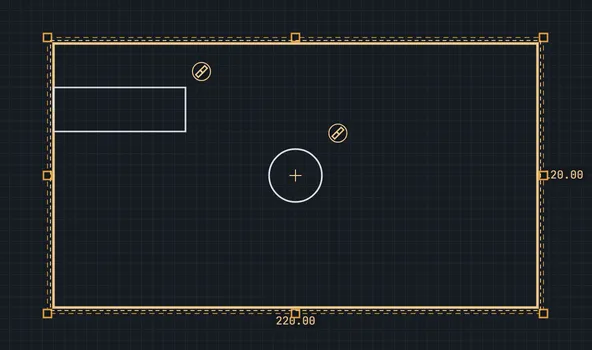
Space evenly left to right, or top to bottom
Section titled “Space evenly left to right, or top to bottom”Spaces shapes out with equal gaps between them. The first and last shapes stay where they are.
- Select three or more shapes, then click the direction to space them in.
Guides
Section titled “Guides”Construction lines for laying out a drawing. They snap, but aren’t cut.
Offset guide
Section titled “Offset guide”Shortcut: G
Adds a guide line a set distance from an edge of the material or of a shape.
- Click the edge to measure from: a material edge or a straight edge of the drawing.
- Type the distance and press Enter. A negative distance puts the guide on the other side.
Remove all guides
Section titled “Remove all guides”Deletes every guide in the drawing.
- Click Remove all guides. Ctrl+Z brings them back.
Machine area
Section titled “Machine area”Shows or hides your machine’s cutting area, to check the material and parts fit.
- Click Machine area. The cutting area appears as a dashed outline, sized from 454 Control’s machine settings, or a machine you choose.
- It warns you if the material is larger than the machine can cut, or if shapes sit outside the area.